Deus Ex 2: Invisible War
Overview information
| Publisher, Year | Eidos, 2003 |
| Genre | FPS/FPSneaker/"RPG" |
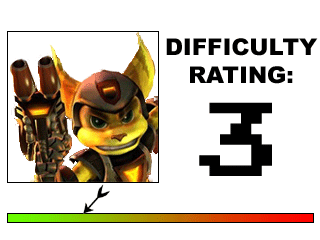
| Difficulty earmarks |
|
| Time for 1 run | 2-4 hours |
| Contributors |
Deus Ex 2: Invisible war is the depressingly mediocre and unworthy successor to the legendary, ground-breaking Deus Ex. It lacks the open-ended feel and playstyle of the original, being largely a "corridor game", giving you a much smaller world with far fewer choices which have little or no consequence to the game. That aside, it's decent as a standalone FPS/RPG hybrid, and is an example of a middle-of-the-road title for Hardcore play. It has been given a "3" difficulty rating for metagame play, though with certain restrictions you could eek it up to a 4. A completely passive run might even be high as a 6, but you really have to restrict yourself and avoid mechanic abuse. Add +1 to the difficult if you use the 'Realistic' difficulty setting, since it makes both you and the AI easier to kill. So, if you are a fantastic metagamer, this game shouldn't be a challenge - but with ample restrictions, it can at least be a refreshing change of pace.
Difficulty Settings
DX2 has the same difficulty settings as from DX1 (though, read this as "easier than DX1 difficulty settings"), with the upper two being "Hard" and "Realistic". The primary difference from Realistic and Hard is the amount of damage you and your enemies can withstand. In realistic, both your enemies and you will suffer extreme damage from all weapons, and certain weapons such as rocket launchers spell instant death for you. Headshots are especially lethal on Realistic, so a lucky shot from any one of your enemies can completely ruin your day. On Hard, weapon damage is drastically decreased all around, making it harder for your enemies to put you in an instant death situation, but your enemies have a lot more health. It's a tradeoff, but generally speaking, Realistic is still considered the hardest for hardcore because of the rise of instant death. This means you have to know the game well, and know how to avoid being seen when you take your shot. As such, it is a great candidate for someone looking to start hardcore gaming.
This guide assumes you will be playing in "Realistic" mode.
General Reference Material
Weapons (Ranged) (Including firing rates, locations, damage output, etc)
Weapon Modifications (Description of mods)
Ammunition (Consumption rate)
Enemies and NPCs (Bots, humans, hybrids, etc and their armament, including friendly NPCs)
Murder for Free (Killing without penalty or without hostility)
Videos
There is a growing collection of videos at the playithardcore Youtube account that documents, from start to finish, a hardcore, bloodlust run. You can view them chapter by chapter here: Videos.
Bear in mind, Hardcore runs are easier if you avoid combat or approach it intelligently instead of playing it as you would Killing Floor.
Making the game interesting
There are several ways you can modify your playstyle in order to make the game more interesting or more challenging. You can apply any of the standard playstyles to your game, or make it even more interesting. I've listed some potential ways to do it below:
Passive Play Walkthrough
This is a customized guide aimed at finishing the game without knocking out or killing a single human, except where the plot absolutely requires it. It takes a lot more thought and planning into character build, and focuses heavily on Bio-energy management, stealth and finding unique ways around problems.
You can go through all of Seattle and Mako, for instance, without even once killing or harming a single person, and dispatching only 2 Spiderbots (even less if you are really crafty). The guide is more abridged than others, skipping all areas where you'd normally be dealing with allied or neutral characters, instead focusing only on areas where you will encounter hostiles.
Walkthrough
Early Game
The early game is the easiest portion, as you face the least number of hostile enemies and the majority of them are equipped with weak weapons. In Bloodlust, however, this can actually be more difficult - ask your weapon selection is more limited and you don't have the resources to withstand a lot of fighting.
This covers Tarsus, Upper Seattle, Lower Seattle and Mako Weapons Facility.
Mid-Game
The mid-game will put you in a few difficult situations, though the combat difficulty is only marginally higher than the early game. Bloodlust gets a bit of a downer here as there aren't as many friendly targets worth dispatching. There are a few tricky areas, however, and there are a few more spots that prove dangerous if not properly prepared for them. Towards the end of this section, you will face some interesting challenges, particularly on Bloodlust, as the offensive capabilities of your opponents rises.
The mid-game includes Medina and the Arcology, Trier and the Black Gate.